Two weeks ago I encountered something strange: when looking for an article on how to install a Skype for Business (SfB) trusted application server, I couldn’t find a step-by-step instruction.
It could be because I’m a terrible Google or Bing user, or because there really isn’t one explaining what I wanted to do. All I could find were simple instructions on how to configure a trusted application pool in SfB, using the administration pages or using powershell commands, and even though that is a required step, that is only part of the story: you do need an actual application server. MSDN itself also hasn’t got a step-by-step on doing this, so I decided I write one myself based on all the info I could find all over the forums, KB’s, codeproject, MSDN, stack overflow, Lync articles,…
So what did I want? I want to develop UCMA 5 trusted server applications, using application endpoints, not using user endpoints. Those who have knowledge on Microsoft Lync or SfB (which is a requirement for this article I’m afraid) know that if you want to run and/or develop this, your application must run on a trusted application server. Additionally, I want to use auto-provisioning of my trusted application. There are a lot of manuals (on Lync at least) describing how you can get a none-domain development machine with Visual Studio to work and connect to your Lync server by providing all endpoint info, doing crazy things with certificates and so on, but this is not what I had in mind. Even more because a lot of those methods are trial and error by many different people. I wanted my trusted application server to run in the SfB domain (a separate test domain for development), completely equiped to run trusted applications, and containing a Visual Studio installation to test/develop a UCMA application.
First step is to think about how our domain will look like. For Lync, we need at least a domain controller and an Exchange server to work comfortably, so I took a router and five machines to create a separate network that implements the Matrix.vox domain (not really original, but the thing needs a name):
- DC1: Windows 2012 R2 Standard, domain controller installed (and thus DNS) and certification authority. Make sure to install this CA role, and, make sure to write down the name of the CA, since you’ll need this later on when configuring your trusted application server. I created five domain users that I will use to sign in to SfB. Instructions on how to install a domain controller are very easy to find, and are not part of this article.
- EX1: Windows 2012 R2 Standard with Exchange Server 2013. Installation of Exchange server isn’t hard because there is a lot of documentation available (it is a couple of years old in the meantime). Also, take into account that I’m not trying to build a mail infrastructure here: Exchange is only installed because certain functions of SfB rely on it. For example, I did not configure it to send mails to the outside world, but sharing contacts and agenda’s is possible.
- SFB1: this machine is my SfB server. I use a simple installation (no high availability, just a single server installation). A magnificent step-by-step manual on how to install this can be found here. The rest of this article assumes you have working SfB installation where domain users can sign in, and where you have access to the administration interface, powershell and topology builder! Of course, this post assumes you have basic knowledge of SfB and UCMA SDK.
- APP1: this server will be our trusted application server. It is a clean Windows 2012 R2 Standard edition, and I added it to the domain.
Important note: Since my installation is a separate domain for development and testing, I have a domain administrator account available at all times to do these actions. If you do not have this, for whatever reason, take into account that certain actions require certain privileges. See the MSDN reference on the commands to find out which priveleges you need.
Creating a trusted application server in SfB
First step to do is create a trusted application server in the SfB environment. This can be done either with the Topology Builder, or with powershell commands, whatever you prefer. I prefer the Topology Builder. Open the Topology Builder, browse to the “Skype for Business Server 2015” node of your organisation and right click the “Trusted application servers” folder to add a new server. If you start with a clean installation as I did, this will be fairly simple. If you are in complex environment, or an upgraded system, make sure to pick the right node in the right organisation.

Right-clicking the node will provide you with one option called “New Trusted Application Pool…” and thruth to be told, I think this is a strange name for the option: one would expect “New trusted application server…”; after all, we are in the trusted application servers node. As it turns out, “pool” and “server” are not really used consistently in the SfB software. I guess a server holds a pool of applications, but even then naming could be better. Either way, a wizard will popup, asking you the FQDN for your new trusted applications pool. This should be the FQDN of your application server.

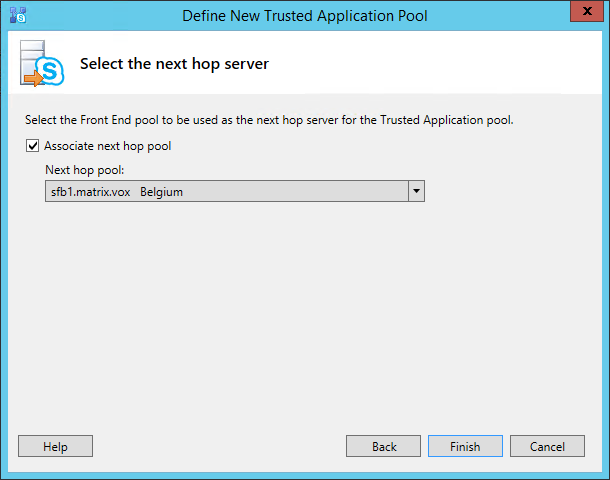
Click Next and associate the next hop server (or pool). In a simple installation, you will have only one option.
Click Finish to end the wizard. Even though your server will be part of the topology, the topology must still be published. To publish your topology, right click the root “Skype for Business server” node and select “Publish Topology…” menu item. A new window will popup. Just click Next.

The topology should publish without any problems. Don’t worry about the to-do list it presents. It basically tells you that there are some things you have to do on the application server, which of course are the next steps in this article.

Before moving our focus to our application server, you might want to check the SfB administration website. Your new application pool should be visible already. Since we didn’t do anything on the server yet, the replication flag is still red. We’ll fix that shortly. Also, there are scenario’s where you don’t really need this replication, but if you are going for auto-provisioning of your applications, this is a must have.

On the application server, there are three things to do, assuming the server is already in the domain (if not, do this first):
- Install the SfB core components, and set up replication of the configuration store
- Add the necessary certificates
- Add the UCMA 5.0 SDK
To set up the core components and replication, insert the SfB installation media in your application server, and run the deployment wizard. In the deployment wizard window, the prepare active directory step should be checked as completed. If this is not set, you are most likely not part of the domain, or, you are not able to access the domain or domain information. Click the “Install or Update Skype for Business Server System” link.

In the window that pops up, select the “Install Local Configuration Store”. This will install the core components and the local configuration store.

In the local configuration store setup window, select the option to copy the information directly from the central management store and click Next button. Click the Finish button in the window that comes after it.

Once the setup completes succesfully, the deployment wizard should show local configuration store was installed succesfully.

After completing the core, I found out two steps are needed to complete the replication of the configuration store. Not sure whether this is the official way, but, it is the way I got it working twice, and I found no other way to get it working. First step is to execute the Enable-CsReplica command in the SfB powershell window. This apparently doesn’t seem to do very much… it just enabling, not replicating I guess.

If you run the Get-CsManagementStoreReplicationStatus cmdlet, you will also see our local store is not yet up-to-date.

Most of the articles I read apply powershell commands to invoke the replication at this point. However, in the installations I did, that didn’t do the trick (or at least, made the replication work). It turns out a reboot of the system is the magic action to do here. As such, step two to complete the replication is a reboot of your system. When your application server is back online, go to the SfB administration website. If all went well, you should see your application server is up and running and replicated!

This completes the first of three parts: installation of the core components and replication of the configuration store. Next step is adding the required certificates to your application server. Remember that in the beginning of the article I told you you will need the name of the CA of your domain…. well this is the time to get it. Fire up the SfB Powershell window and execute the Request-CsCertificate command. The command takes the following parameters:
- New: just indicating you want a new certificate.
- Type: default.
- CA: the name of your CA, formatted as FQDN\CA-name, so in my case this was dc1.matrix.vox\matrix-DC1-CA. Just providing the name will not work.
- Verbose: though the command will work without verbose option, the verbose option shows you the certificate details, especially the thumbprint is interesting, which you will need in the next step. If you don’t use verbose, you’ll have to get the certificate’s thumbprint in another way, but why make life hard if it can be simple as setting the verbose option.
Select and copy the thumbprint once the command is completed.

Second command to execute is the Set-CsCertificate command. This takes the Type and Thumbprint parameters. Make suure to use the same as above, and things should work out fine.

That’s all for step 2. Step 3 is the installation of the UCMA SDK.
Important: some posts and articles on the internet suggest that the only thing needed on a trusted application server is the UCMA SDK. After installing the SDK, one needs to run the “Bootstrapper” command manually to install and enable the replication.
In my installation(s), this never completed succesfully, even though I had clean machines. Even more, when you want to install the core and configuration replication via the SfB setup (as we did in our first step), you will encounter an error saying the core components are already installed! Don’t panic when you encounter this error. Go to add/remove programs configuration panel and remove SfB core components. After that, run the SfB setup again and install as we did, then install the certificates. As the UCMA SDK is already installed, the next steps of our article are no longer needed, and you are ready to add applications.
Download the latest UCMA 5 SDK from the MS website and launch it. There is only the Install button, so just click on that one. Your installation might fail with the below error: you need to install Media Foundation feature on your server. On a Windows 2012 R2 Standard machine, this is not installed by default. As such, close the UCMA setup window, go to your server administration overview, find the add roles and features panel, and select the media foundation feature. Once that is installed, run the UCMA setup again and it should finish without any errors.

And that’s all there is to make a trusted application server ready.
Adding a trusted application
Once you have this server available, you can add one or more trusted applications to the server (or pool, as you wish). For completeness, I add the steps required to create a new trusted application and endpoint in the SfB installation.
First, execute the New-CsTrustedApplication command in the SfB powershell (note: you can do this on either the application server or the SfB server). The command takes following parameters:
- ApplicationId: a unique name for your application. Strictly spoken, this name doesn’t have to be unique, it has to be unique in combination with the FQDN of the server. That is why in all following commands, you will have to provide the FQDN as well. Of course, to avoid confusion, choosing a meaningfull and unique name is the best thing to do and never hurt anyone.
- TrustedApplicationPoolFqdn: the FQDN of the application pool where the application will run on.
- Port: a port number that will be used.

After completion, you’ll see all the details of your trusted application. Though this might be sufficient for your purposes, most applications do require an endpoint (depends on the type of application you are writing and what it is supposed to do in SfB). To add an endpoint to your application (and you can add more than one if this would be a requirement), execute the New-CsTrustedApplicationEndPoint command and use the following parameters:
- ApplicationId: the name you provided for your application.
- TrustedApplicationPoolFqdn: the FQDN of your application server.
- DisplayName: a free to choose display name for your endpoint, which will show up if your SfB users connect to the endpoint.
- SipAddress: the SIP address of your endpoint. Of course, check with the sysadmin whether the name is ok to use (or not yet in use by other people or applications). Make sure you provide the addres with the sip: prefix, else, the command will fail.

When the command completes, you have a new trusted application defined. However, it still requires to be “activated”. Run the Enable-CsTopology command to make your changes active in the SfB environment.

Now you can go to the SfB administration website and see your application in the list of trusted applications.

Verifying the installation
To verify our installation was succesfull, and to check whether the auto-provisioning works for our newly declared trusted applciation, and since this is a development environment, I installed Visual Studio 2015 Community Edition on my server. Create a new C# console application and add a reference to the Microsoft.Rtc.Collaboration assembly that is in the UCMA installation directory.

I used the following code to check everything was working.
Important: this is bad code, and uses bad practices. DO NOT USE THIS IN ANY WAY for real applications. It is only intended to verify our installation and configuration!

Note that we can use the ProvisionedApplicationPlatformSettings here, and the only thing that must be provided is our application ID we configured before. The application ID must be formatted as “urn:application:applicationID”. The first parameter is optional. The ApplicationEndpointSettingsDiscovered callback function will be called only if you have an endpoint configured for your application. There is some logic in the world after all. Run the application and check whether any exceptions occur.
Important: when you run this application the first time, you might get an exception that the SIPEPS assembly was not found. This exception occurs because by default, Visual Studio will prefer 32 bit compilation, and, the server and SfB components are 64 bit. Go to the project settings and change the build options to make a 64 bit application, and all should just work fine.
Once you have the endpoint available, you can use the endpoint just as any other type of endpoint in SfB; same goes for the collaboration platform object. The biggest change compared to other applications, are these few lines and the ProvisionedApplicationPlatformSettings usage.
Conclusion
Next time somebody looks for a step-by-step manual to install a trusted application server, I hope they end up on this page, and find this a proper solution. I took me some time to figure it all out. MSDN documentation is usefull but only to explain the different commands involved, you won’t find the different steps nor the order in which to execute them .
As mentioned in the introduction, this is not the only way to develop UCMA trusted applications. There are ways to build up a development environment without your machine being part of the domain, and without provisioning.
Finally, it is obvious why most of the sample applications MSDN provides for UCMA applications, use user endpoints. For user endpoints, all the above is not needed and you can run your application simply by providing user credentials. In most cases this will be enough, and then you should use them. Only when you specifically need application endpoints and the power that comes with them, the above can help. In production, you will (almost) always run on an application server that is prepared as I did… it will never be a “development” machine. As such, even when you develop using another setup, it might be good to have the above setup to test how your application will behave in an environment similar to production.

This really saved a lot of time and worked perfectly the first time around.
LikeLike
Good Job
LikeLike